Aerostich Mini LEDs
Me and the Aerostich Mini LEDs
A Helpful Guide by Douglas Howard
Much of the info applies to both Front Whites and either of the Rear Facing Red units. Some info that applies to both sets may not appear in both sections so read it all first. OK remember I LOVE these lights and recommend them to one and all.
So, I do love these little lights. BUT I have to get this off my chest. Whoever designed these with the ridiculously thin wires deserves a reserved spot in LED hell. There is no conceivable reason to make them so thin and fragile. It is uncomfortably difficult to strip the insulation without either cutting through the strands or when sliding the insulation off actually breaking the wispy wire strands while pulling. While I am not the master electrical ace many are, I am no slouch either but I had trouble with this aspect. Work with an inordinate degree of care! *Read this as "working as if performing brain surgery!"*
I. FRONT WHITE LEDs
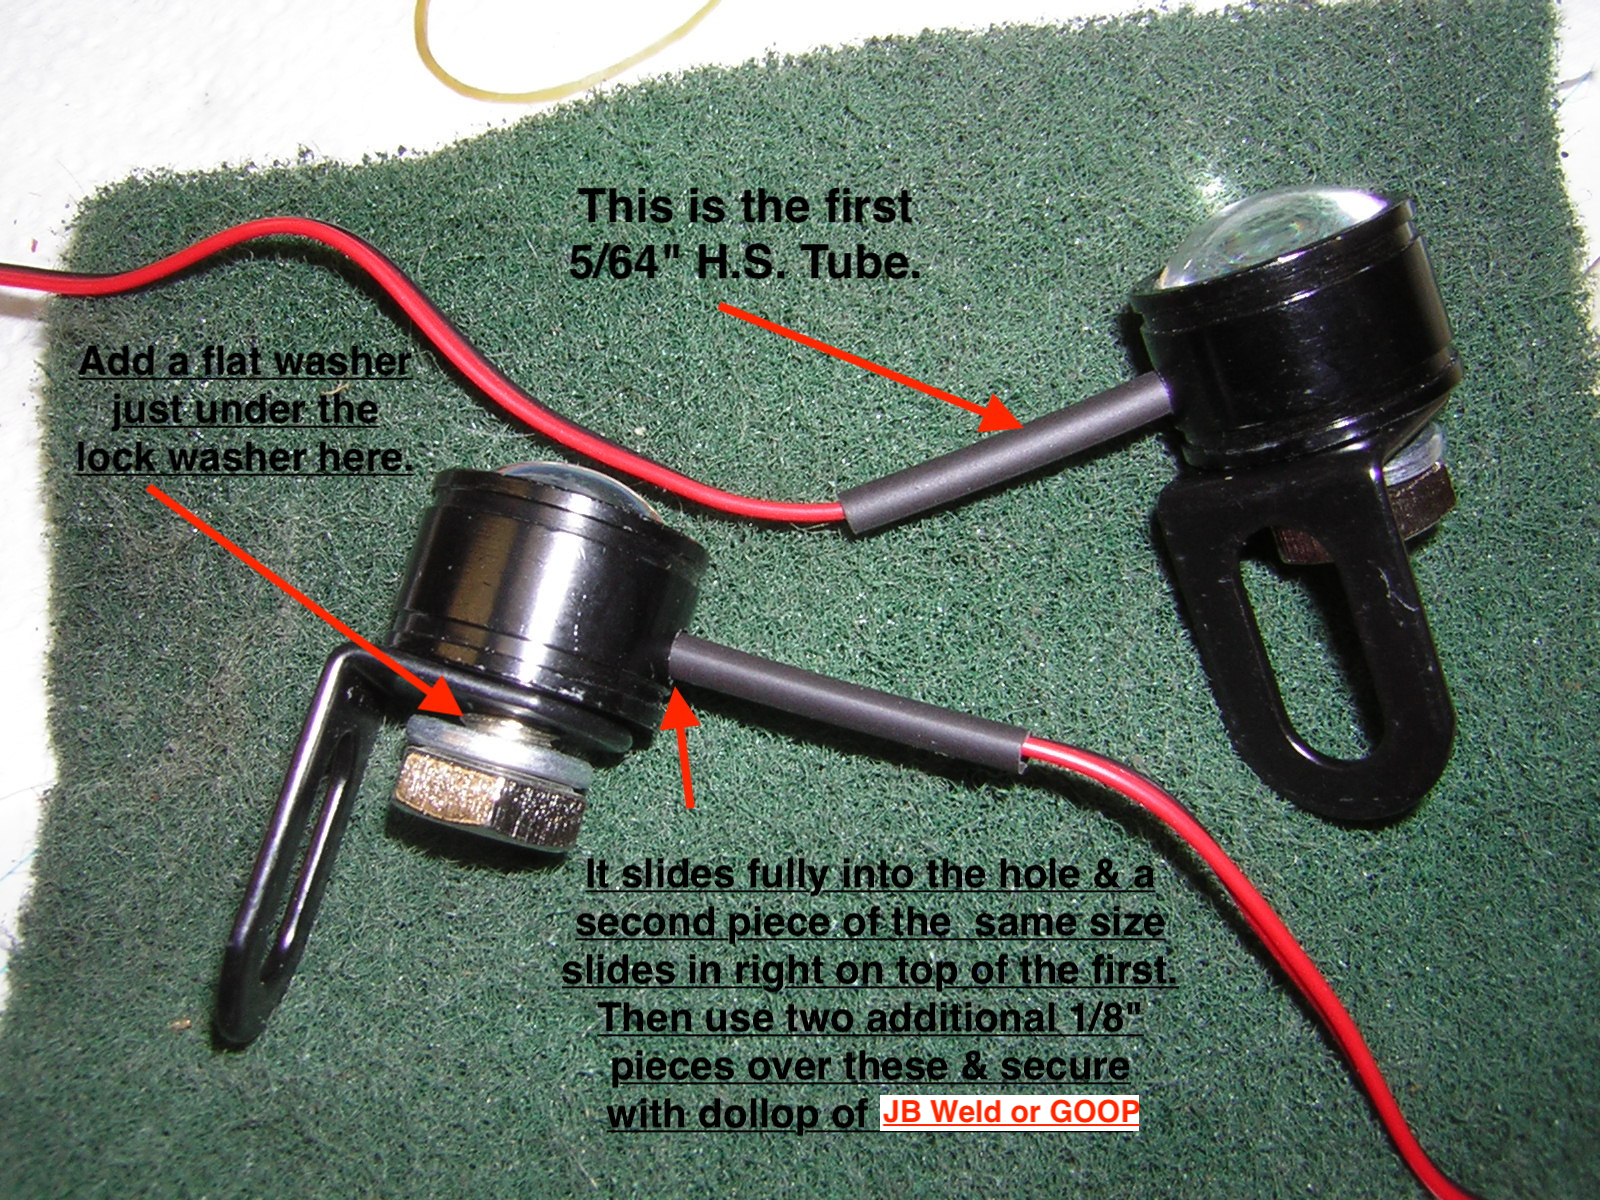
Image #1 (click to enlarge)
Image #2 (click to enlarge)
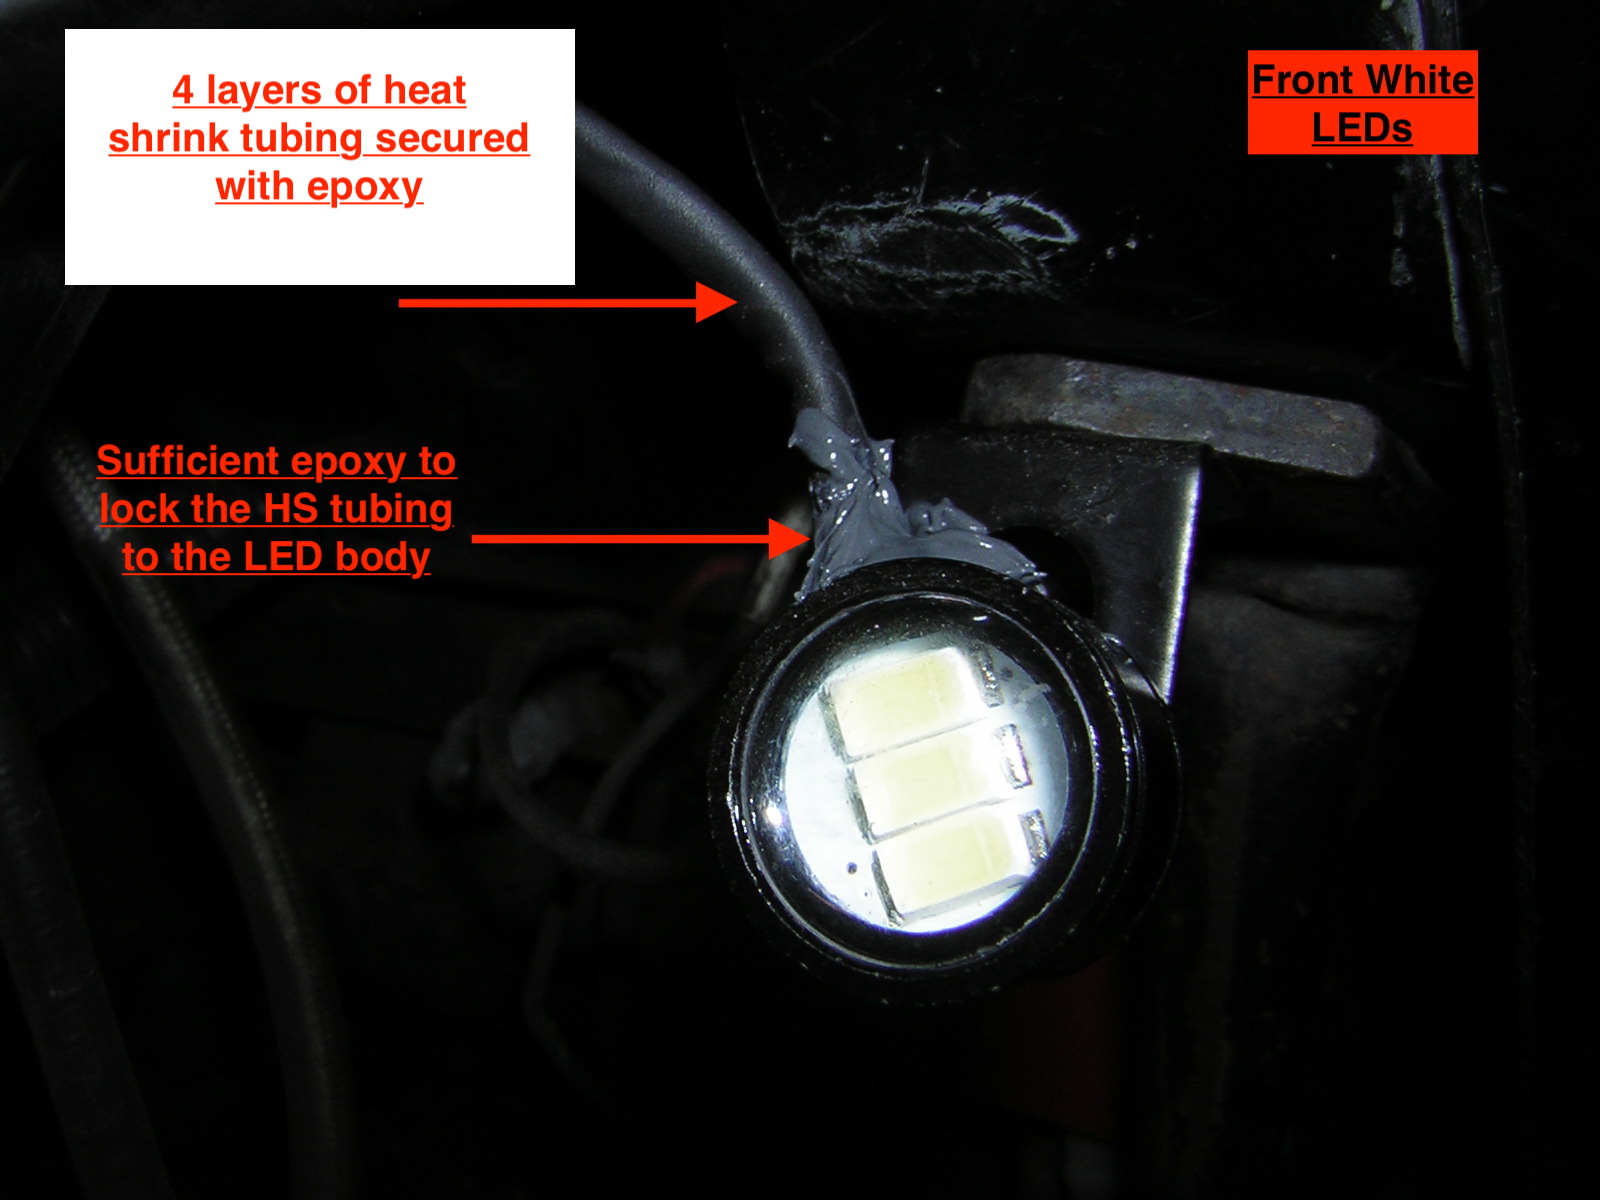
Image #3 (click to enlarge)

Image #4 (click to enlarge)
I found that 5/64" heat shrink tubing slid right over the double leads while actually going right into the hole in the light's body (see image #1). Good support and prevents the edge of the exit hole from cutting the wires rubbing against it. A second piece of same size fits right over the first after it was heated & shrunk so now even better support as 2-ply. Well if two is good are not 4 layers even better? So stepping up to two more layered 1/8" H.S. tubing pieces, I built up the support around the paired wires as they exited the light and secured the structure with a generous dab JB Weld epoxy for good luck. (You may use GOOP as it it fairly stiff but the epoxy is really more effective. See image #3) Be sure you are getting epoxy well onto & into the LED metal body as well as onto the 4-layer HS tubing sleeve. I would not use silicone seal or any such that is soft & flexible. It was a bit difficult to join the 2 red (pos) and 2 black (ground) ends to each other due to the fragility of the wire strands but I found, with great care I could twist them together, apply a thin tinning coat of solder which still allowed them to be flexible and then joined and soldered these pairs to appropriately colored 18 gauge primary wire to run up into the fairing to provide the electrical current. (Needless to say, everywhere it was possible all joints and runs in the thin wiring were strengthened and protected by multiple layers of heat shrink tubing. I find this method makes the job secure and it is so much fun to watch this stuff constrict around the wires. Gotta have fun!)
Additionally, having read some complaints that tightening the mounting bolt that holds the lights to the bracket had squished and cut some of the wires inside and rendered the light unrepairable, I added an additional flat washer under the lock washer supplied (see image #1). This ensured the bolt wouldn't enter the light housing too far and make contact in any way with the wires inside. (If you peer into the threaded hole that the bolt secures in, you can see the wire leads there.) That washer keeps the bolt away from doing mischief. Didn't want to take a chance. A drop of thread lock really assures no loosening will occur.
II. REAR RED LIGHTS OR FLASHERS
Now on to the rear red LEDs. The SPECTACULAR flashing Reds are the stars of this group and way better than the description in the catalogue reveals.
Not included in the description of these beauties is the fact that they not only flash rapidly BUT alternately, side to side like hyper banshee twin fireballs. I am saving a video of this dramatic effect in case some fool actually hits me from behind and says, "I didn't see him".
These lights are fully assembled in a harness, such that you cannot use basic heat shrink tubing. As soon as you get them in your hands, use epoxy or GOOP to secure the wires from moving around the hole area of the LED. Allow to dry overnight and double check to see that there is no chance of the leads wiggling or pulling out. Again work like it is brain surgery. These leads are diabolically fragile. I then took some clear vinyl tubing( from Home Depot, Lowe's or any hardware store or aquarium supply shop). I slit the tubing lengthwise so I could spread it and slip it over the wire leads. Length of tubing determined by your individual determination. Finally apply the epoxy/GOOP schmear to firmly engage the body of the LED and the end of the vinyl tubing (see image #4). A liberal application saves grief later! Carefully strip and join the ends of the red & black LED leads and then join up to an 18 gauge set of wires to bring your 12v electrical supply to the lights. Secure all wiring with nylon ties, pipe cleaners or duct tape depending on your style.
This guide is written, with possibly excessive detail, because I wish I had read this first and done the job exactly as laid out. I am not trying to be condescending or demean your knowledge & skill. But you must work as if this otherwise fantastic product is unbelievably fragile. Take your time, listen to good music while you do it.
Buy Aerostich Mini LEDS