Zero Preparation

Getting the Zero ready to face the elements of a Duluth, MN winter required adding a few farkles for improved function, comfort and safety. Aerostich Product Development Engineer, Rod H., was tasked with doing this prep work. Below is a project summary and a few of his thoughts about preparing the bike for winter riding. When asked about his initial impressions about working on a the electric motorcycle, Rod said “It’s a fun, simple bike to work on. The electronics are easy to get at and there is no fuel tank in the way”.
Prep included:
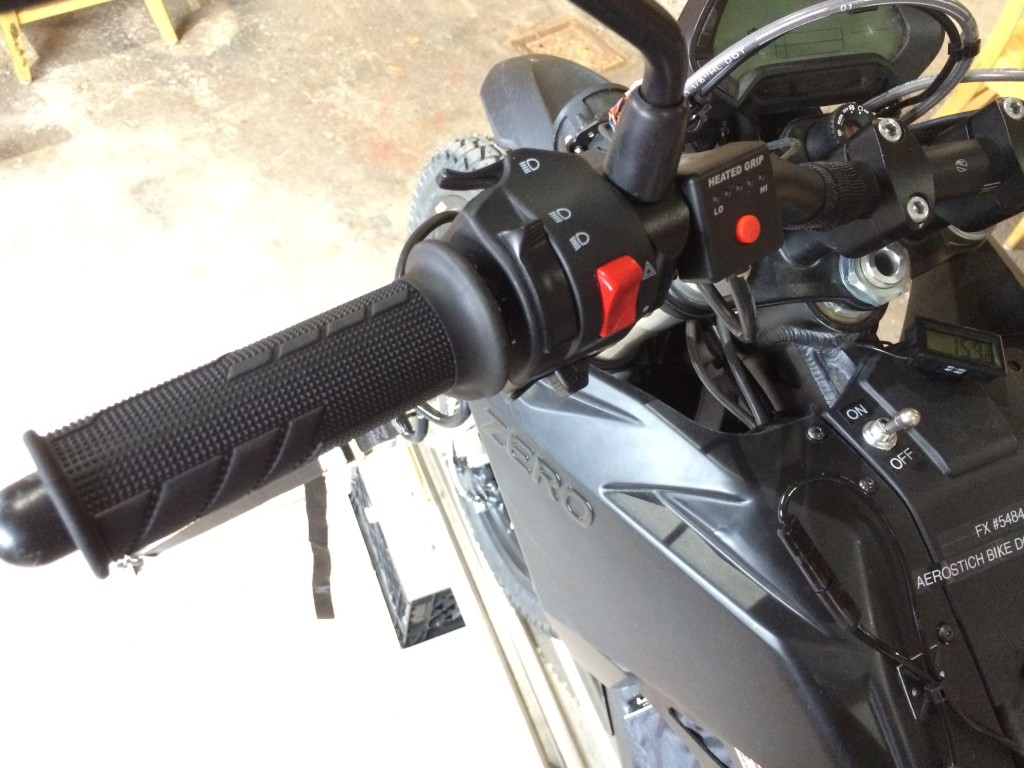
1. Removed hand grips and installed #1602 BikeMaster heated grips. Knurled left end of handlebar made for a difficult installation on that side. On right side, grip fit over throttle sleeve easily. Used adhesive supplied with kit to secure throttle grip. Mounted controller on left side of handlebar. Used SAE plug from added 12V power supply to make power and ground connection. BikeMaster fuse under right side panel at front of bike.
“Knurled handlebar end on left side made electric grip installation challenging. Installation was completed just before mallet handle shattered, handlebar buckled, or grip split open. No glue needed.”
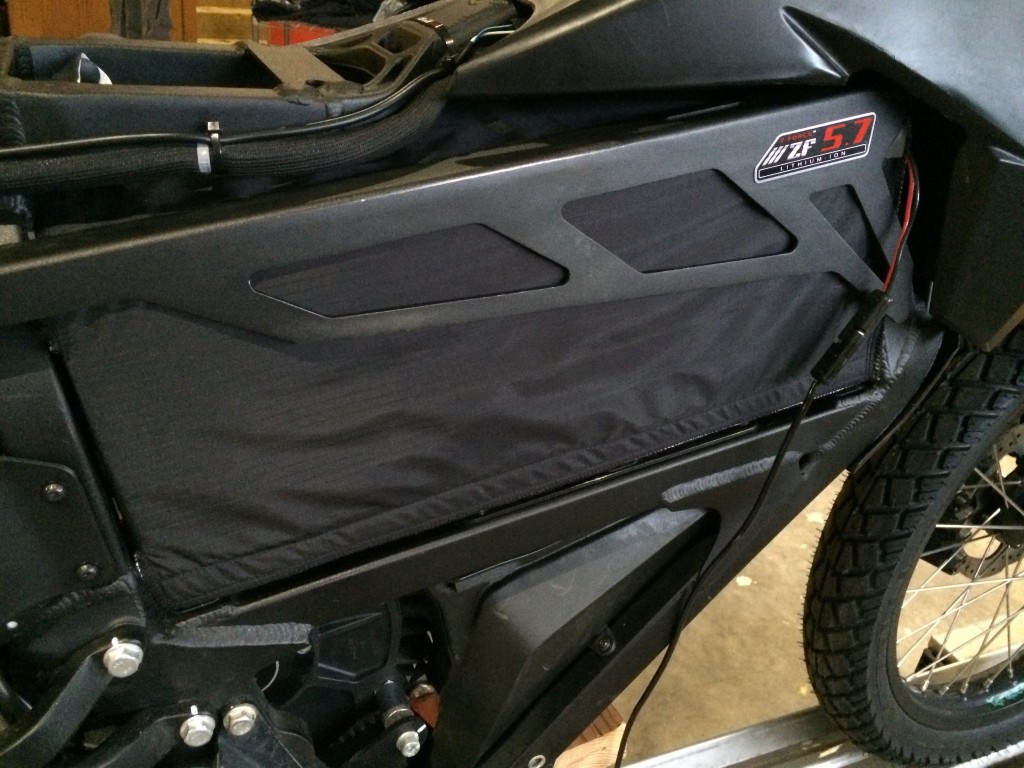
2. Aerostich staff designed and produced warming wrap for batteries. Blanket is similar in construction to Aerostich heated vests. Covers top, front, and sides of batteries. Wrap is sandwiched between batteries and battery mounts, held in place at lower edge with Velcro. Warming wrap SAE connector attached to SingPad 12V 60W DC power supply, mounted to top right battery mount. 120V AC power supply plug for battery warming system located next to motorcycle’s charge cord plug.
“Battery heating blanket is an experiment too. Construction is similar to one of our electric vests. This model Zero has a battery setup that lends itself well to wrapping. How much heat will be needed to maintain a reasonable battery temp overnight remains to be seen. More damage to be done by overheating the batteries than getting them too cold. Started out with that in mind.”
3. Installed SAE and Quiconnect style connectors for heated vests or bibs. Connectors are located in front of seat, left side of bike. Power from added 12V power supply SAE plug.
4. Added #4268 Mini Remote Thermometer. Display mounted to top panel behind handlebars. Battery operated display, no power connection to bike. Thermocouple attached to center rear of front battery case. Remove upper right front panel and release Velcro holding display when removing front battery.
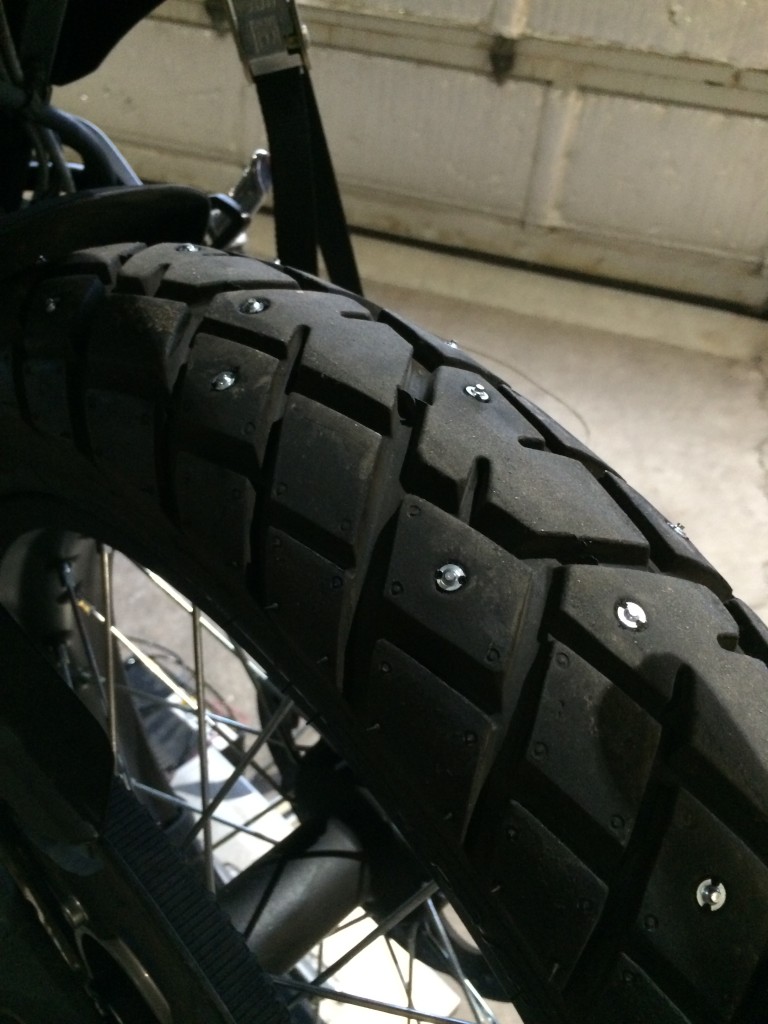
5. Studded front and rear tires with about 100 studs per tire. Used Grip Studs #1100 for rear tire, #1000 for front tire. Pattern intended to provide good traction on bare and ice covered pavement. Can add or remove studs to adjust performance.
“Studding the tires was a breeze. I think we spent more time discussing patterns than I did installing the studs. Used a cordless drill and the scooter length Grip Studs. Tires did not have very deep tread. Even when I got a little carried away with the screw gun I didn't poke any holes in the tire.”
“Put about a hundred studs in each tire. Tried to leave lots of space for rubber to contact the pavement. New to this. We'll see if we got it right.”
“Start to finish, the job took roughly 22 hours. About what I expected. Would probably take 6 hours to duplicate (plus blanket construction,) now that the design work is done.”